Fire Resistant Cladding
If you are looking to install any type of cladding, including composite cladding, it is important to think about how
Products in Stock
Lowest Prices
Express Delivery
10-Year Warranty
March Sale. Up To 15% Off.
If you’re looking to reduce the amount of maintenance involved in keeping your composite decking looking great, learning how to lay weed membrane can help it stay weed-free season after season.
Weeds can be a problem in any garden or outdoor space, and they can sometimes emerge through the gaps in your decking. In addition to looking unsightly, some weeds can potentially damage decking boards and infrastructure. Our weed membrane is the perfect solution because it creates a barrier that can block weeds while keeping the soil underneath healthy.
Weeding is a job that nobody enjoys, so it’s always best to stop weeds from becoming an issue in the first place. Our step-by-step guide will tell you everything you need to know about how to cut, lay and secure the weed membrane, in addition to answering any other questions you might have.
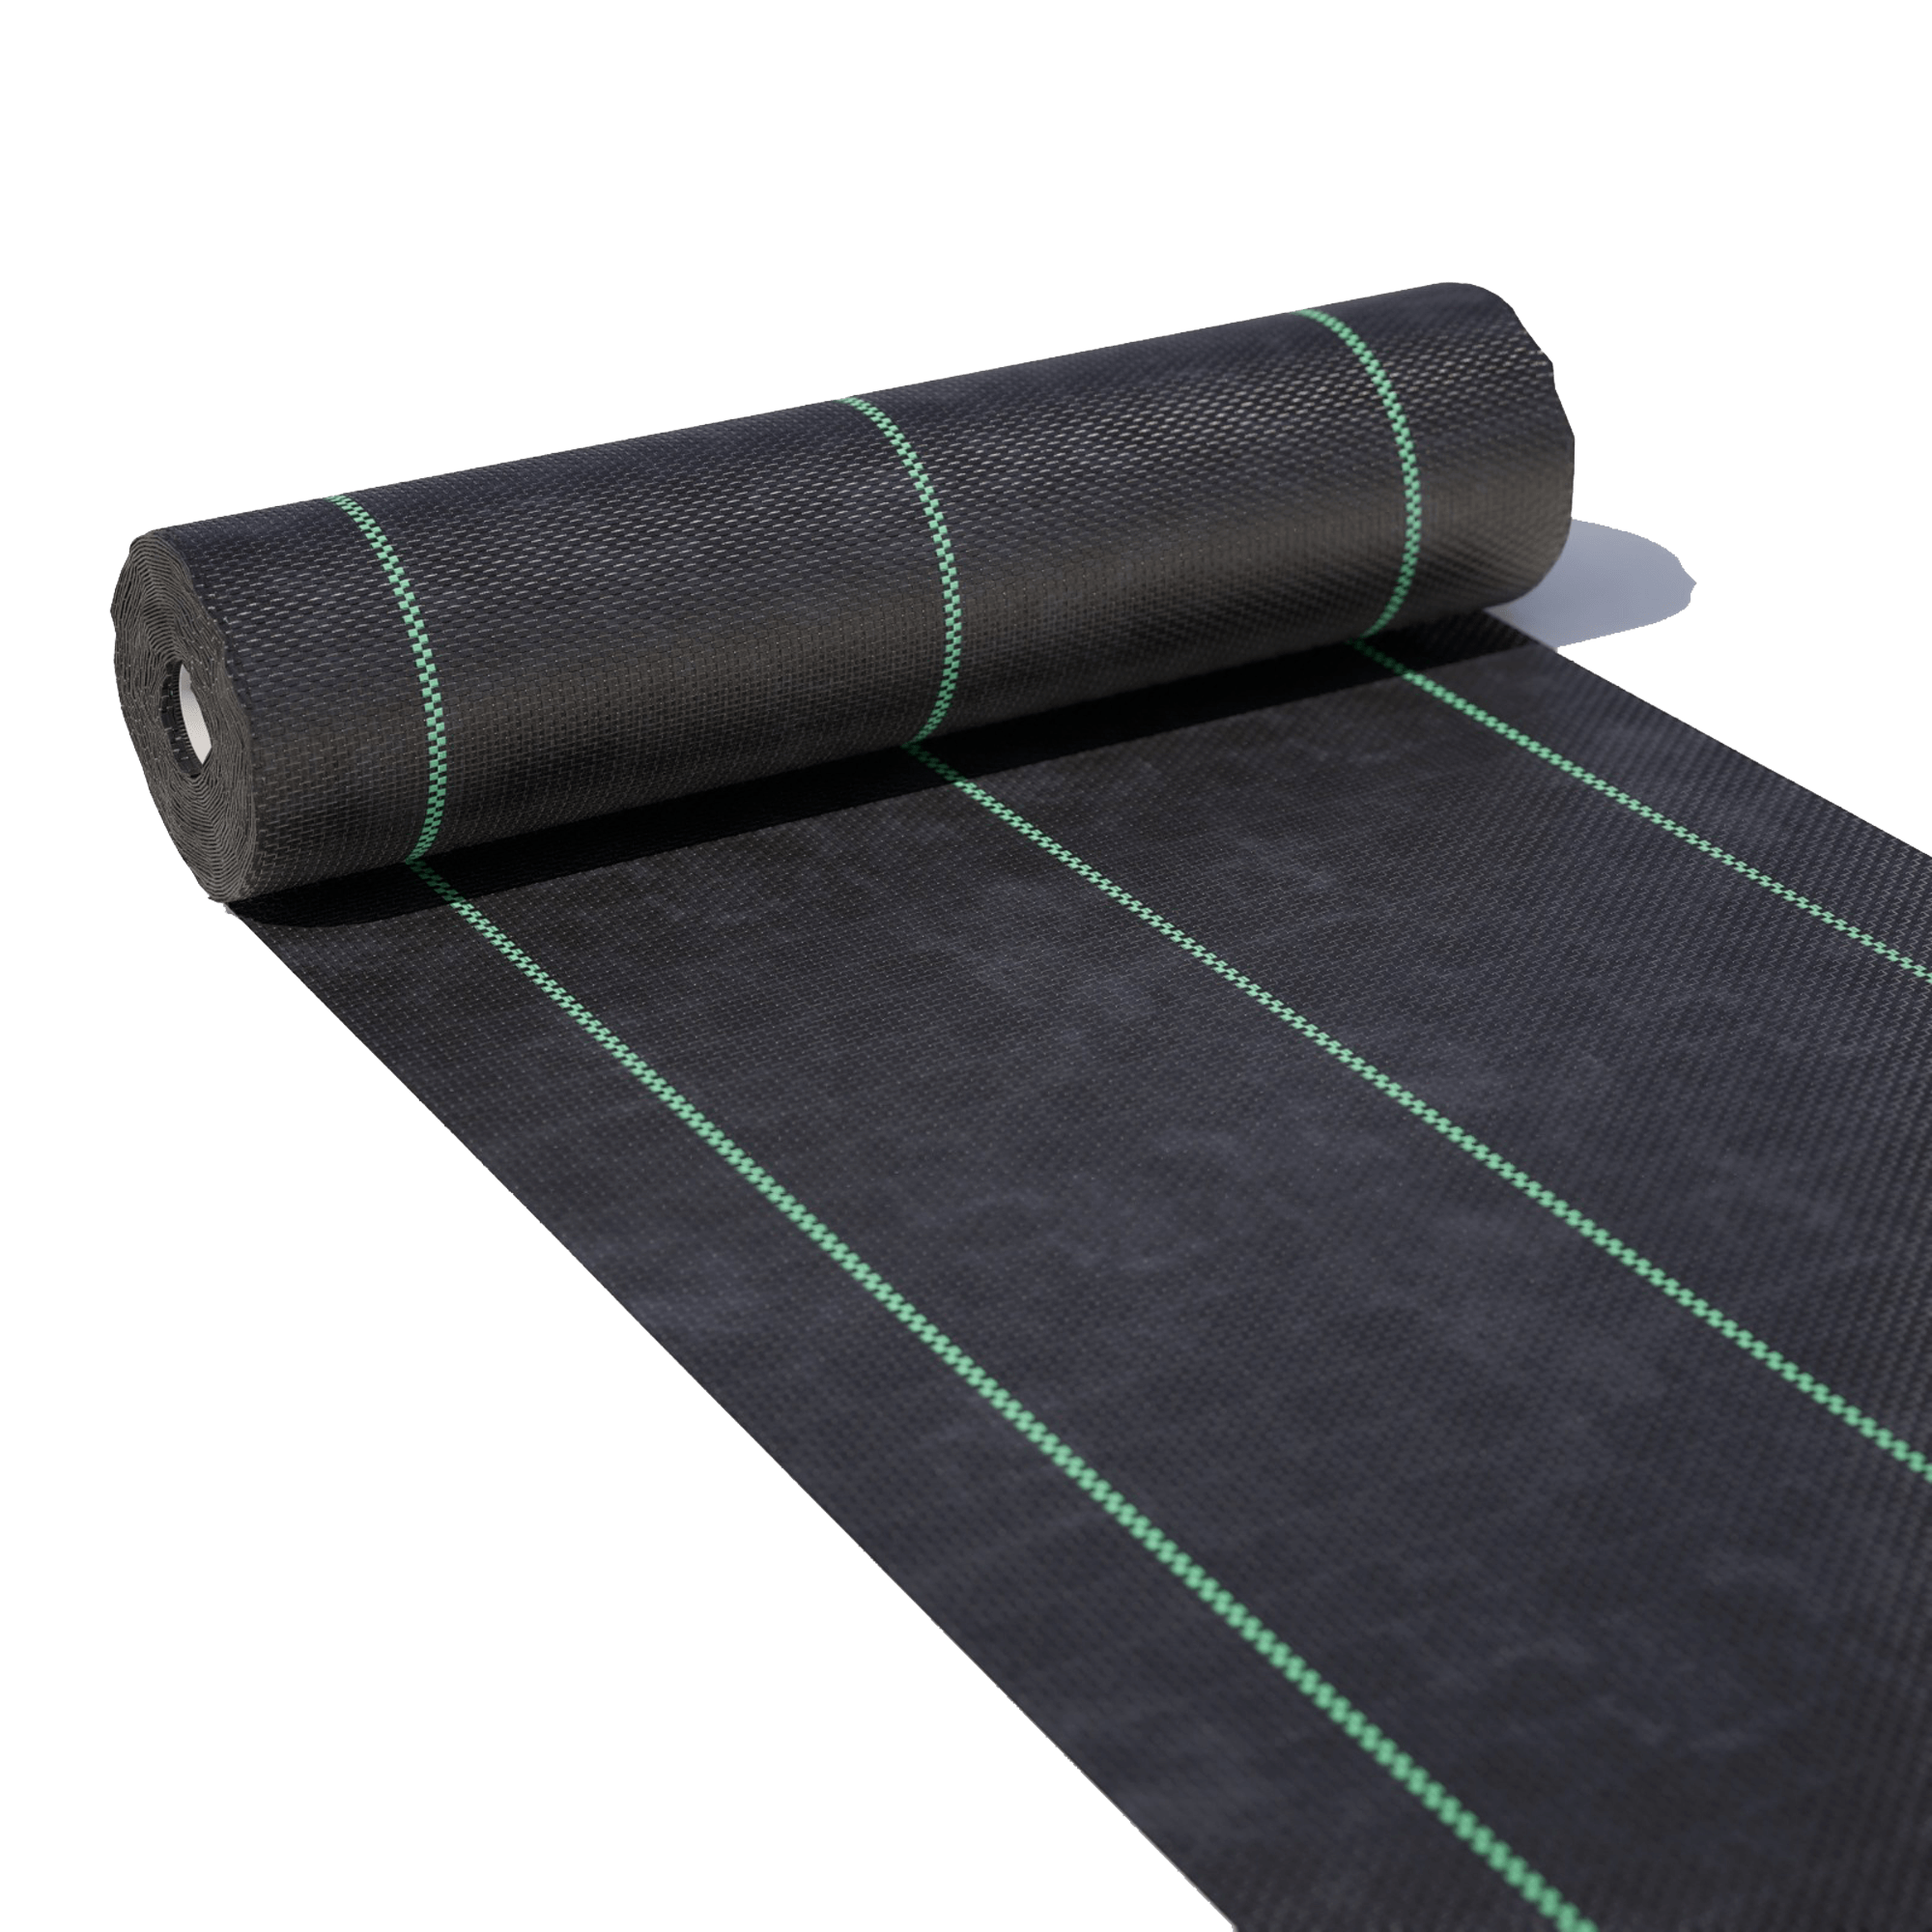
A weed membrane is a specially designed piece of fabric that is laid under gravel, stones, decking or other surfaces to prevent weeds from growing out of the ground. It accomplishes this primarily by blocking the sunlight that weeds and other plants need to grow. One of the best things about weed membrane is that it is installed underneath the surface, which means it doesn’t spoil the look of your garden or decking area.
Our weed membrane offers an eco-friendly solution compared to weedkillers and other chemicals that can affect other plants, seep into the soil, and harm pets and wildlife. Our heavy-duty, UV-stabilised woven material is tear-resistant and durable but allows air, water and nutrients to pass into the soil. It is also very easy to install.
Find out more about how weed membrane works in our useful guide.
There are several factors that should be considered before laying it.
Laying it under gravel and other surfaces or structures such as decking, we share detail on how to prepare, cut and secure the weed membrane for the best results below.
Weed membrane serves as a physical barrier and blocks out the sunlight that plants need to grow. This means that you will need to cut holes in the membrane to allow your existing plants and flowers to continue to thrive. You will also need to leave holes or gaps for any seeds or seedlings you plant.
It’s also worth keeping in mind that the surface below the weed membrane can harden. This is why watering the area can be a good idea. You don’t want to overdo it, however, as this can sometimes cause spots to become waterlogged before the water has a chance to drain away.
Gather the equipment you need, which will generally include:
Use the sweeping brush and rake to flatten and clear the area where you intend to place the membrane. Sharp rocks, existing weeds and unwanted plants should be removed. Raking the soil can help you spot any sizable rocks and pieces of debris, which you can then remove by hand. Ensure the ground is as flat as possible before proceeding to laying the weed membrane.
Measure the area you are covering and then cut the weed membrane to size using garden scissors. The size you need will depend on the area you plan to cover, but it is a good idea to buy a bit more than you need to account for wastage. If you use multiple pieces, overlap them by 10 to 30 cm to help keep them stable. If you want to keep existing plants (or plant new ones), you should cut holes in the membrane so these areas are not covered up.
Lay the membrane across the area evenly. The most common way to secure it is with pegs or garden staples around the edges to fix it in place. You can also use garden edging materials or heavy mulch to secure the membrane. Cut away any leftover membrane once it is secured.
Cover the membrane with your chosen surface, such as stones, bark or gravel. You can also cover it with a shallow top layer of soil, but this will not generally be suitable for plants because their roots will not be able to grow through the membrane. In general, you should aim for a depth of around 5 cm of aggregate on top.
Water the area around the weed membrane and monitor it to ensure it is draining and working as it should. Read our blog answering Does Weed Membrane Let Water Through for more detail.
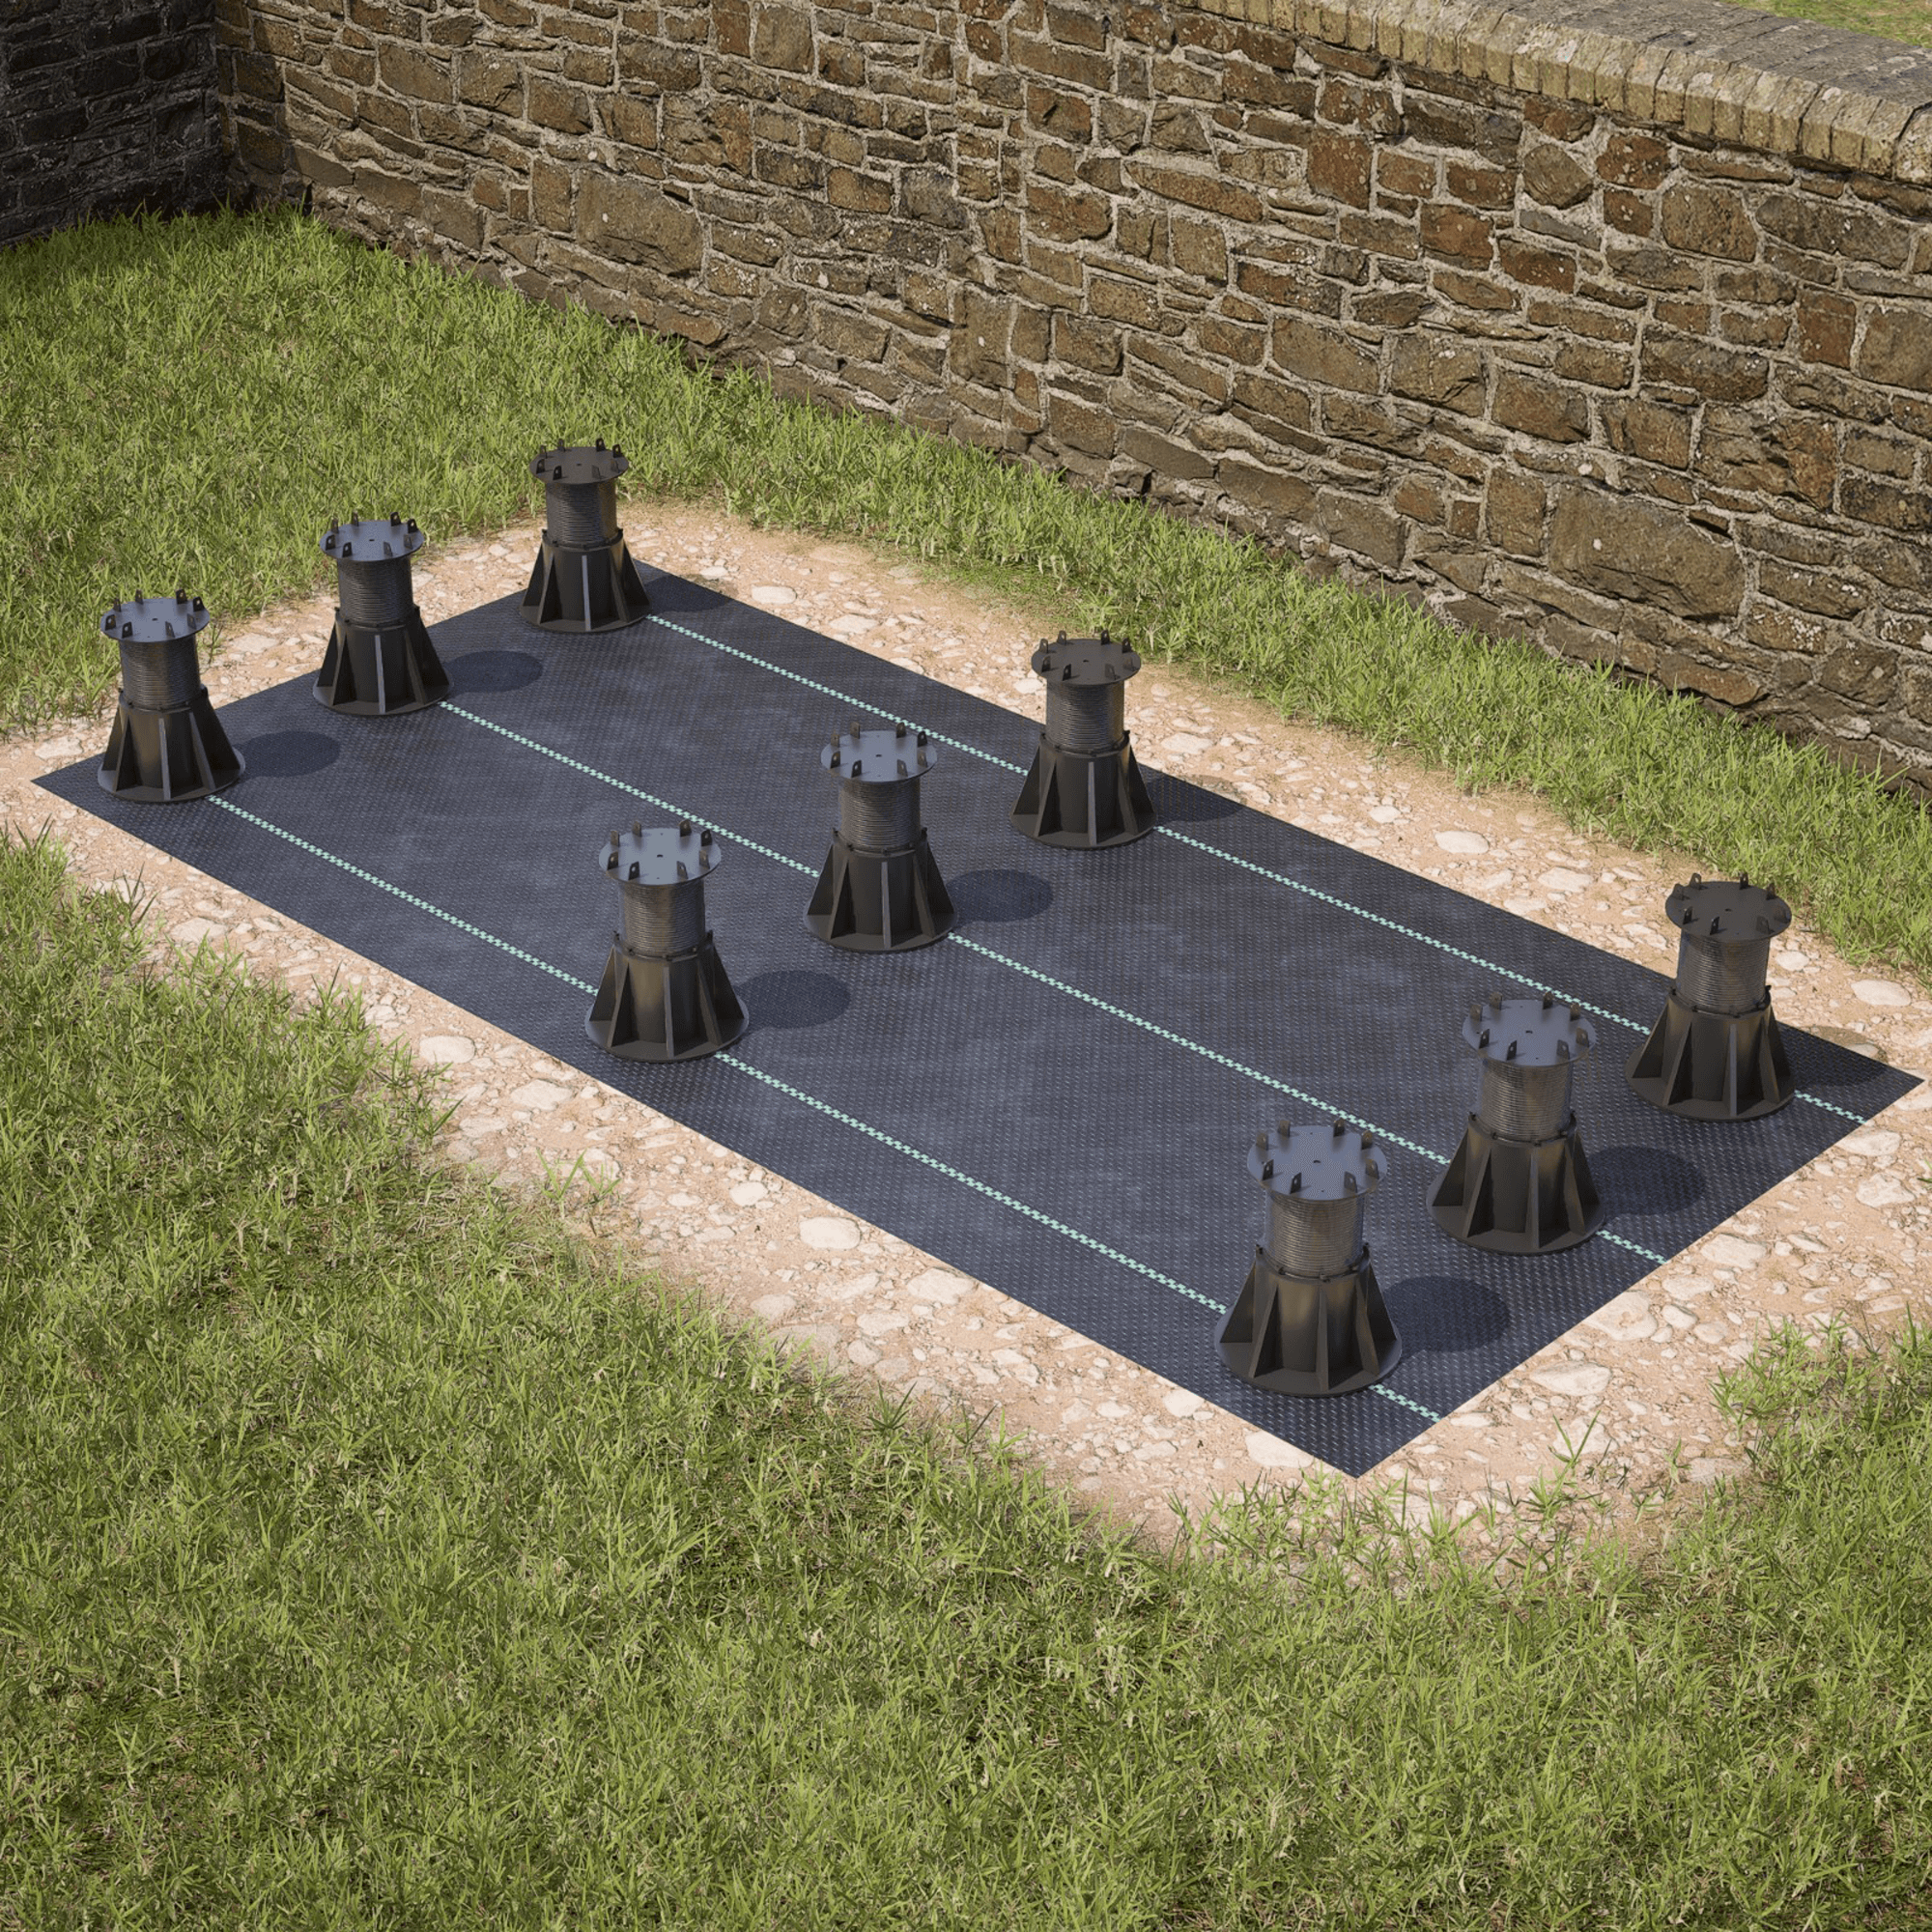
If you’re wondering how to use weed membrane with decking, the process is very similar to laying it under gravel or other aggregate surfaces. Start by removing any existing debris where the decking will be situated, and follow the same steps provided above. The weed membrane will be covered by the decking, so you don’t need to worry about the look of any aggregate you place on top of it. However, you should still cover it with a thin layer of easy-draining aggregate to keep it weighted down and in contact with the ground.
Another important thing to remember is that your weed membrane should not be stapled to decking joists, as it won’t be as effective and could damage the decking’s substructure.
You can technically place weed membrane over grass, but it is not recommended. It could partially kill the grass, but some stems and roots may still get through the membrane, leaving a patchy look and making the membrane less effective at its primary purpose of keeping weeds down. Ideally, any existing grass should be removed before starting to lay your weed membrane.
It’s easy to learn how to cut weed membrane. Simply measure out the space you need to cover and cut it with sharp scissors; gardening scissors are ideal. When cutting, it is helpful to leave an extra 10 to 30 cm of overlap space on all sides and anywhere that separate pieces meet.
A variety of toppings can be placed on weed membrane, depending on where you are placing it and the look you want to achieve. Gravel, soil, decorative aggregates and stones are all popular choices for covering weed membrane.
Weed membrane can do wonders for your garden and reduce your maintenance time and effort by preventing weeds from popping up in the first place. It can also help keep your decking looking weed-free and prevent the damage that some weeds might cause when growing through the infrastructure and decking boards. Composite decking boards are more durable and weed-resistant than timber boards, but keeping them free of weeds can still help prolong their lifespan.
Check out Dino Decking’s full product range, including our weed membrane. This heavy-duty garden control fabric is durable and tear-resistant and can help keep your garden or deck free from weeds for years to come.
Our sample pack contains a sample piece of each colour currently available. Order your free sample pack today to compare the colours and get a true feeling of the Dino Decking range!
If you are looking to install any type of cladding, including composite cladding, it is important to think about how
You might love your garden, but are you really making the best use of it? Nobody uses their garden all