How to Clean Metal Railings: The Step-by-Step Guide
If you want to keep your outdoor areas looking shiny and new all through the year, you might be wondering
Products in Stock
Lowest Prices
Express Delivery
10-Year Warranty
Bank Holiday Sale. Up To 15% Off.
Whether you want to refresh an old fence or enhance the look of a new one, painting it is a great way to improve its lifespan and curb appeal. So, if you’re looking for a step-by-step guide on how to paint a fence, you’ve come to the right place. In this article, we’re going to teach you:
But before we get into any more detail on how to paint a fence, we’d first like to talk about why you should paint your fence, and the benefits that you can expect as a result.
Painting your fence offers several practical and aesthetic benefits. It’s not just about making it look good. It’s also about protecting your fence from harsh conditions and prolonging its life. Here are some of the reasons why you should paint your fence:
A well-painted fence acts as a shield against rain, snow, and UV rays. These elements can cause rotting, warping, and fading over time, especially if you live in a harsh climate like a coastal area. When you apply a durable coat of paint to the fence, however, the paint will prevent moisture from seeping into the wood and will protect it from cracking under the sun, extending your fence’s life and keeping it fresh and pleasing to look at.
Talking of pleasing the eye, a freshly painted fence is a simple yet effective way to enhance your home’s overall appearance. With the right colour, you can complement your home’s style and landscaping, making your property more inviting and attractive and potentially even increasing the property value.
Unlike modern maintenance-free fencing, which can last for many years with little to no maintenance, that’s not quite the case with fences made out of more natural materials like treated or untreated wood. The good news is that they can still last for many years and require little maintenance, as long as they are painted properly.
That being said, whilst paint offers a lovely colour for fencing, it needs re-application every 1-2 years. Using staining on a fence means it can last longer with less maintenance.
See the difference between painting and staining in our helpful guide.
Before diving into how to paint a fence, it’s crucial to gather all the necessary tools and materials first. Having everything on hand will make the task smoother and more efficient. To paint a fence, you’ll need:
Optional tools, like a paint sprayer, can speed up the process and provide an even finish but they can be more expensive than a roller.
Proper preparation is the foundation of a successful painting job. Skipping this step can lead to uneven coverage, peeling paint, and wasted effort.
Remember, if you’re using brand new, pressure-treated or dip-treated fence panels, you have to wait for them to weather for 2-6 months before applying paint or stain. Painting them too early will cause flaking, and nobody wants to repaint their fence 3 weeks after getting it.
So with a weathered and dry board, here’s the step-by-step guide on how you prepare to paint a fence:
Begin by cleaning your fence to remove dirt, debris, and mould. Use a pressure washer for a thorough clean or a scrub brush with a mild cleaning solution. Ensure the fence is completely dry again before proceeding.
Inspect the fence for cracks, loose boards, or other damage. Fixing these issues before painting ensures an even and durable finish.
Sanding helps to smooth rough patches and remove any flaking paint or old finishes. This step is essential for creating a surface that paint can adhere to properly.
If your fence is made from untreated wood or has been exposed to harsh weather, applying primer is a must. Primer seals the wood and provides a solid base for the paint, enhancing durability and coverage.
If instead of painting your fence you’d rather stain it to achieve a more rustic and natural look, you should read our guide on how to properly stain a fence as the process is slightly different.
Learning how to paint a fence with a roller might seem like a difficult task, but it isn’t. In fact, it’s actually fairly easy, especially if you’re going to be painting large, flat surfaces. Here’s what you need to do:
Select a roller with a medium to long nap. This type of roller is ideal for textured surfaces like wood or composite fences, ensuring smooth and even coverage.
If you want to learn how to paint a fence fast, here’s what you need to do.
Painting with a brush can be time-consuming but very effective for making sure you cover every spot. They’re great at getting in corners and applying a nice, even finish to your fence.
A good synthetic brush is perfect for painting fences, and it never hurts to have a large one for the big brush strokes that will cover the majority of the fence, and a small one for the corners or to add in any little details.

Painting a fence doesn’t have to take all day. By employing the right techniques and tools, you can finish the job faster than you would think, even if it’s your first time.
Breaking the task into smaller and more manageable sections allows you to focus on each area and achieve a consistent finish.
A paint sprayer can significantly reduce painting time while providing even and professional-looking coverage. However, it’s essential to practice on a test surface to avoid uneven application.
If you’re working with a long fence, getting assistance can speed up the process. One person can paint while another handles preparation or detail work.
Darker shades of paint need less coats to look complete, often saving you time, money, and a little extra paint for any other garden projects you have going on.
Effective tool cleaning can save you time and a lot of effort in the long run. We always recommend washing your tools straight away before the paint dries up and makes it 10x harder. If you’re using water-based paint, a simple wash in warm soapy water should rinse it off effectively. But if you’re using an oil-based paint, you’ll want to soak your brushes in white spirit since water and oil don’t mix.
To achieve the best results when painting a fence, make sure that you avoid these three common pitfalls:
Skipping cleaning or sanding can result in peeling paint or an uneven finish. Always start with a clean, smooth surface.
Too much paint on your roller can lead to drips and wasted materials. Load the roller evenly and remove excess paint before applying.
Applying just one coat may not provide sufficient coverage or protection. Two coats are usually recommended for a durable and even finish. Make sure to read the instructions provided for the specific paint you use.
Once your fence is painted, proper fence maintenance will keep it looking great for years to come. Here are a couple of tips on how to achieve that:
Wash your fence annually to remove dirt, pollen, and other debris that can accumulate over time. This will keep your fence protected and looking like new.
Small chips and scratches are inevitable. Addressing them promptly will maintain the fence’s appearance and protective layer.
Over time, usually 1-2 years, your fence may require a fresh coat of paint. Repainting every few years ensures it remains protected and visually appealing.
Painting your fence is a straightforward way to protect and enhance the visual appeal of the fence and your overall property. The good news is that when you’re equipped with the right knowledge, tools, and materials, painting a fence doesn’t need to be difficult and take all day.
However, if you don’t have the time or energy to paint your fence, consider going with the easier option of composite fencing. With no painting, sealing, or sanding necessary, composite fencing is a durable and low maintenance alternative to timber fencing and looks just as natural. Skip the work and go straight to enjoying your garden.
Either way, after reading this article, you’ll be sure to have a wonderful looking fence no matter what you choose.
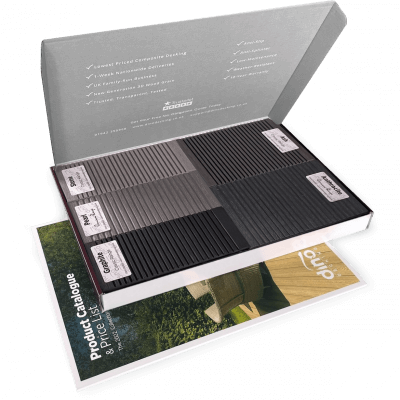
Our sample pack contains a sample piece of each colour currently available. Order your free sample pack today to compare the colours and get a true feeling of the Dino Decking range!
If you want to keep your outdoor areas looking shiny and new all through the year, you might be wondering
Having a deck can be great for entertaining or relaxing in the summer months. Composite decking has a lot of